Philz Advanced Touch CWM Recovery is the full name of this new Recovery image and it is based, obviously, on the ClockworkMod Recovery. It uses the main features of CWM and adds a touch UI that features tons of other new functions for you to use with your Nexus 4. Here’s a list of the most important features of Philz Touch Recovery mode:
- touch user interface with support for customizing interface parameters.
- Built-in AROMA file manager GUI that allows you browse the files you have stored on your device.
- Supports Gesture actions.
- Multi-zip installation menu.
- You can create a custom ROM based on the ROM that you have currently installed on your device.
- exFAT and ext4 partition support for external SD cards.
- it can flash custom ROMs, kernel, radio and modem images.
- Backup and Restore entire ROMs directly from and to your Nexus 4.
Your Nexus 4 should already have the CWM Recovery installed on it. Without it you cannot flash Philz Touch Recovery. You can install the original CWM Recovery using the ROM Manager app from Google Play Store here. Launch the app and install CWM Recovery from within.
- Make sure that the USB debugging option is enabled on your phone.
- The phone’s battery charge level should be over 40% so that it won’t power off during the installation process.
- Read this entire post and make sure not to skip any steps listed below.
How to flash Philz Touch 4 Recovery for the Google Nexus 4:
- Download the Philz Touch Recovery image file from HERE. Save the file on your PC and then move it to your smartphone’s internal SDcard.
- Disconnect the phone from PC and then power it off.
- Boot the Nexus 4 into Fastboot / Bootloader mode. It can be done if you press and hold Volume Up, Volume Down and Power buttons, all at the same time. Select RECOVERY option and press Power to confirm.
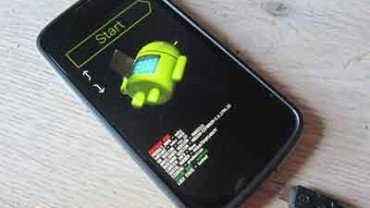
- Wait for the device to boot the CWM Recovery mode.
- Now, select ‘install zip from sdcard’. After that select ‘choose zip from sdcard’. Find the ‘Philz Touch Recovery for Mako’ file and confirm that you want to install it.
- When the installation is complete you have to return to the main Recovery screen and select the option that says ‘reboot system now’.
- The Nexus 4 will not boot into normal mode. Power it off once again so that you will test and see if the new Philz Recovery has been installed with success.
- Repeat the actions listed at step 3 and the phone will boot into Philz Advanced Touch CWM Recovery mode.

>>> Click Here To Get Google Nexus 4 The Best Price <<<
Written by Unknown
We are Creative Blogger Theme Wavers which provides user friendly, effective and easy to use themes. Each support has free and providing HD support screen casting.


0 comments:
Post a Comment