1: MOVE EMAIL ADDRESSES TO DIFFERENT RECIPIENT FIELDS (TO, CC, BCC)
Decide at the last minute you want to blind carbon copy someone instead? No biggie, just do this:
- Tap and hold on an email address or contact name, and then drag it between TO, CC, BCC
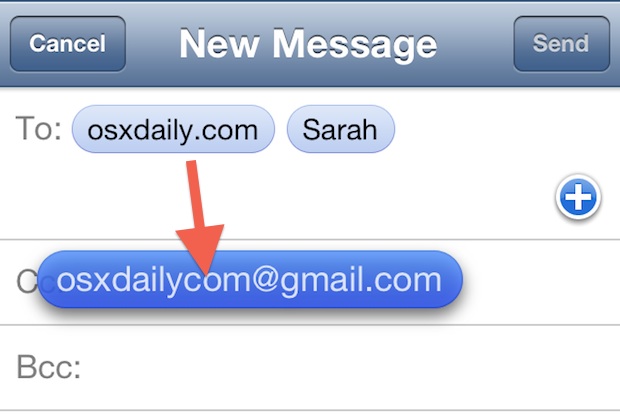
Of course, you can move addresses to any of the fields, from BCC to CC, TO to CC, whatever. Beats typing out an address again, doesn’t it?
2: SHOW MORE EMAILS IN INBOX
Want to have more emails be immediately visible in the inbox, without having to retrieve them from a remote mail server? This is the setting for you, it will keep more emails stored on the device, letting you see more directly on the iPhone, iPad, or iPod:
- Go to Settings then to “Mail, Calendar, Contacts”
- Tap “Show” and choose “100 Recent Messages” or higher
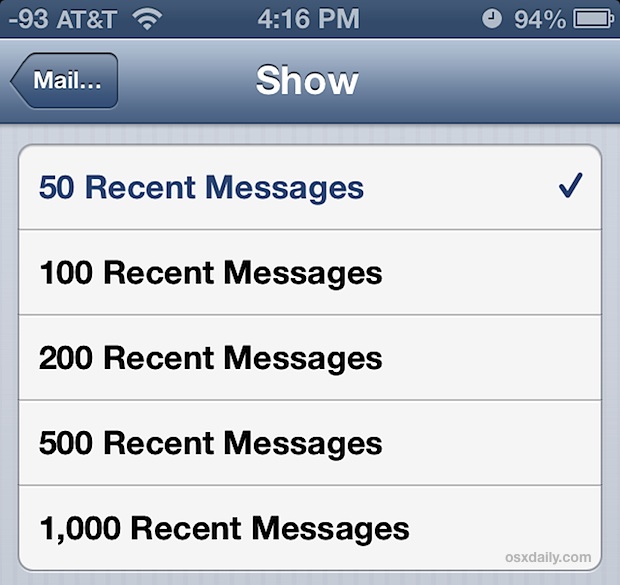
The default setting is “50 Recent Messages”, which means that 50 mail messages will be visible in the inbox by default, and scrolling beyond that must access the remote mail server to retrieve another 50. Changing this setting is very helpful if you wrangle a huge inbox, though the higher settings (500-1000 messages) can have some undesirable side effects of slowing down Mail app on older devices, and even increasing that “Other” space that shows up in iTunes.
3: SEE MORE EMAILS PER MAIL SCREEN
This setting displays more emails per screen in Mail app by adjusting the message body preview size. The default is set to 2 lines, but by moving it to 1 line or None, you can see many more emails instantly without having to scroll at all:
- In Settings, go to “Mail, Calendar, Contacts” and choose “Preview”
- Tap on “None” or “1 Line” to show more emails on each mail screen
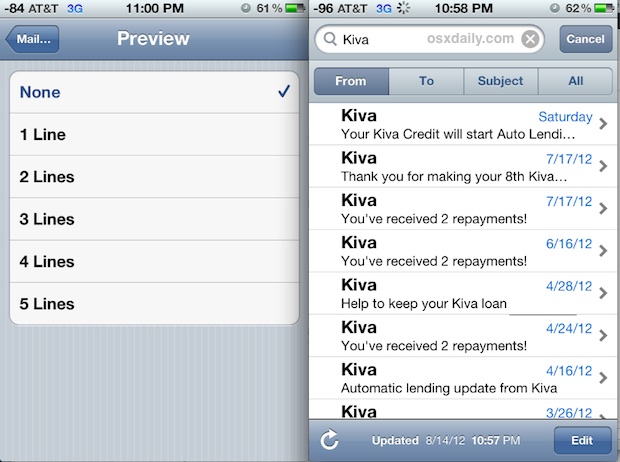
Notice how this differs from the previous tip, in that more emails are visible on each mail screen, but it has no impact on the total number of emails shown in an inbox without accessing the server again.
4: QUICKLY ACCESS ALL SAVED DRAFTS
There is a super quick way to access saved email drafts in iOS:
- Tap and hold on the Compose icon to jump to the Drafts folder
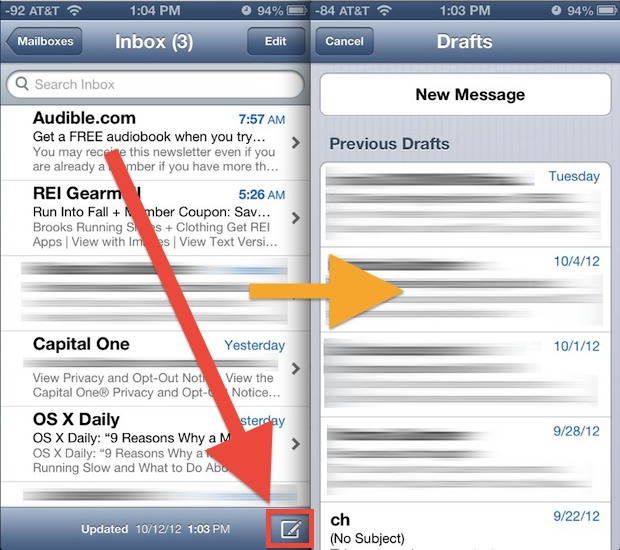
This accesses all drafts, whether they were created and saved on the iPhone or iPad, or on a remote server or webmail client like Gmail. This very handy feature was introduceda while ago and retains full functionality in Mail app for iOS 7. Use it, you’ll appreciate it!
5: BULK MANAGE GROUPS OF EMAILS: MARK AS READ, UNREAD, DELETE
Managing a group of multiple emails is easy in iOS Mail app, but it may not be immediately obvious to all users:
- From the mailbox you want to adjust, tap on “Edit” then tap each mail message you want to adjust so that it’s highlighted with a checkmark
- Tap on “Move” to send the emails to the Trash for bulk deleting, or to another inbox
- Tap on “Mark” to flag the emails as spam, or mark as read or unread
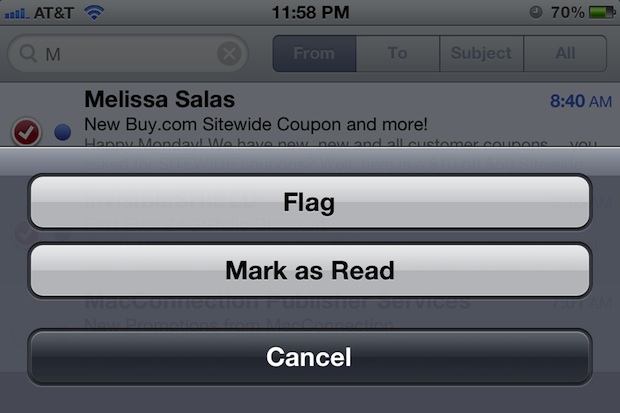
This is very helpful if you’ve gotten a barrage of messages that are either unimportant or just need to mark as read, or when you need to Trash a bunch of them that are clogging up your inbox.
6: INCREASE FONT SIZE TO READ EMAIL CONTENT EASIER
The text size of emails is pretty small by default, and even those of us with moderately decent eyesight can have a hard time reading through long messages at such a tiny font size. Fortunately, it’s really easy to increase the size of the email text to something much more legible:
- Open Settings, then go to “General” and “Accessibility”
- Tap on “Large Text” (iOS 6) or “Larger Type” (iOS 7) and choose a size better for your needs
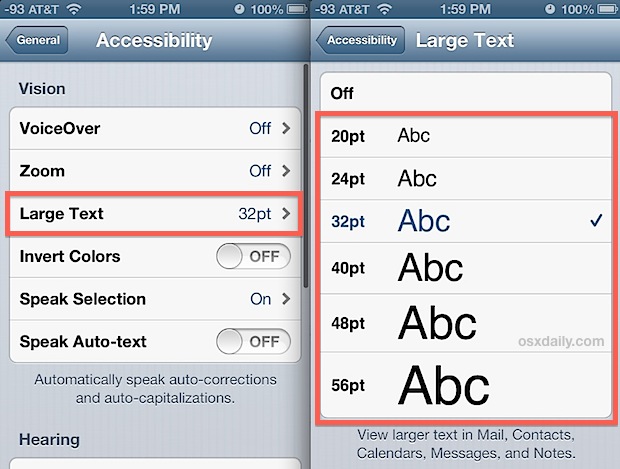
Something to consider with this option is that it will also increase the font size shown in text messages and iMessages within Messages app, which is actually really nice and makes those messages much easier to read as well.
7: REPLY TO PORTION OF EMAIL WITH SMART QUOTES
Smart Quotes are a little-used feature of iOS Mail app that let you reply to just a specific portion of an email, and they’re very easy to use:
- Tap and select any portion of an email to include in the reply, then tap the “Reply” button as usual
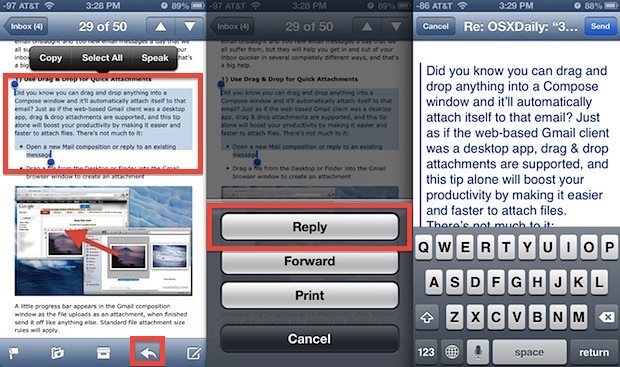
The new email message will now only contain the portion of the email you selected, rather than the entire thing.
8: DITCH OR MODIFY THE “SENT FROM MY IPHONE” SIGNATURE
The default signature for emails sent from any iOS device identifies that device as “Sent from my iPhone” or “Sent from my iPad”. If you want to change it or delete it, it’s quite simple:
- Open Settings, then go to “Mail, Contacts, Calendars”
- Tap on “Signature” to modify or delete it
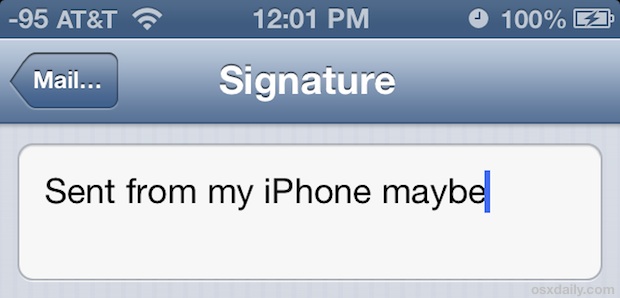
We generally recommend keeping these signatures for a variety of reasons, including the brevity expectation, but if you want to delete it or modify it, it’s easy enough to change back.
9: INSERT PICTURES INTO EMAILS FASTER WITH A TAP
You can easily insert a picture or two into an email message just by doing the following:
- Tap and hold in the message body, and choose “Insert Photo or Video” to find the picture or movie to attach
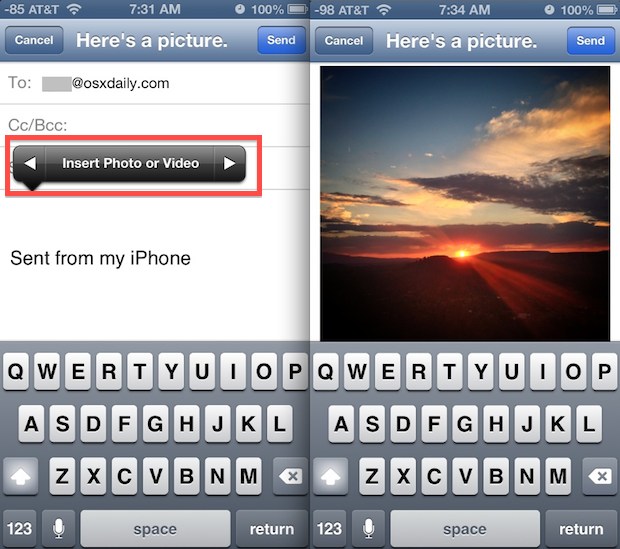
Images can be inserted anywhere into email messages this way, and it’s much much easier than poking around in the Photos app to create a new email from there, or using the copy and paste method to place images into emails.
10: COMPOSE & SEND A QUICK EMAIL WITH SIRI
Don’t want to type out an email message, or maybe you’re hands are busy? Siri canwrite it for you using a simple mail composition command:
- Summon Siri and say “Write an email to [recipient name] about [subject] and say [message body]
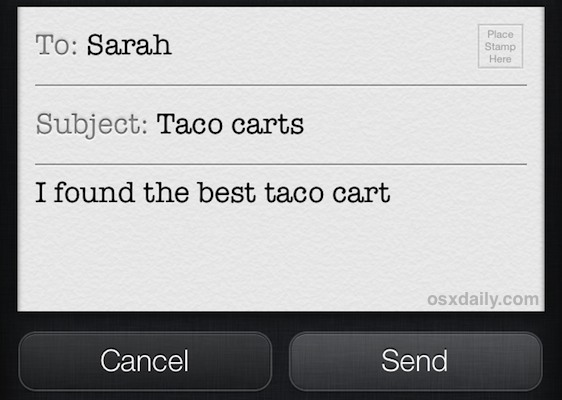
This is really helpful in situations where your hands need to be mostly free and you can’t spend time looking at your iPhone or iPad screen, whether that’s because you’re just occupied doing something else, riding a bike, walking, or maybe you just hate typing on the touch screens.
Source : http://osxdaily.com/


0 comments:
Post a Comment